How to Use Mind Maps to Create Presentations and Free Yourself from Endless Detail Tweaking
Feb 7, 2020
How to Use Mind Maps to Create Presentations and Free Yourself from Endless Detail Tweaking
Feb 7, 2020
You got a task to prepare for the next week's team meeting. Your boss told you to be easy and need not spend too much time tweaking design details.
Just pick the right template and dump the text inside, easy peasy, thought yourself.
1 hour later, you were still adjusting layouts of the first section and wondering whether to change to another template.
If that sounds familiar to you and you hate wasting time on manually adjusting layouts. You are in the right place.

This post is one of the mind map presentation series. We provide 20+ templates in the this post.
Want to skip ahead of the “what” and “why”? Jump to the “how”!
What is mind map presentation
If you hop on Google and search "mind map presentation." You will find the results include creating mind maps in PPT, using mind maps to prepare speeches, and using mind maps as presentations.
But here in this guide, we focus on mind maps as the presentation medium.
Mind maps are tree structures made for note-taking and brainstorming. They are also called Spider Web or Idea Webbing.
A mind map presentation equals to a presentation-ready mind map. The nodes and branches are the slide content, the transitioning between branches is the interaction.
Why is this helpful
The strongest value mind map provides for presentation is the balance between "effort" and "effect".
Comparing to other tools, mind map is not as jaw-dropping as PPT or Prezi can be. But with minimal effort, mind map presentations can reach an acceptable level of visual beauty and animation.
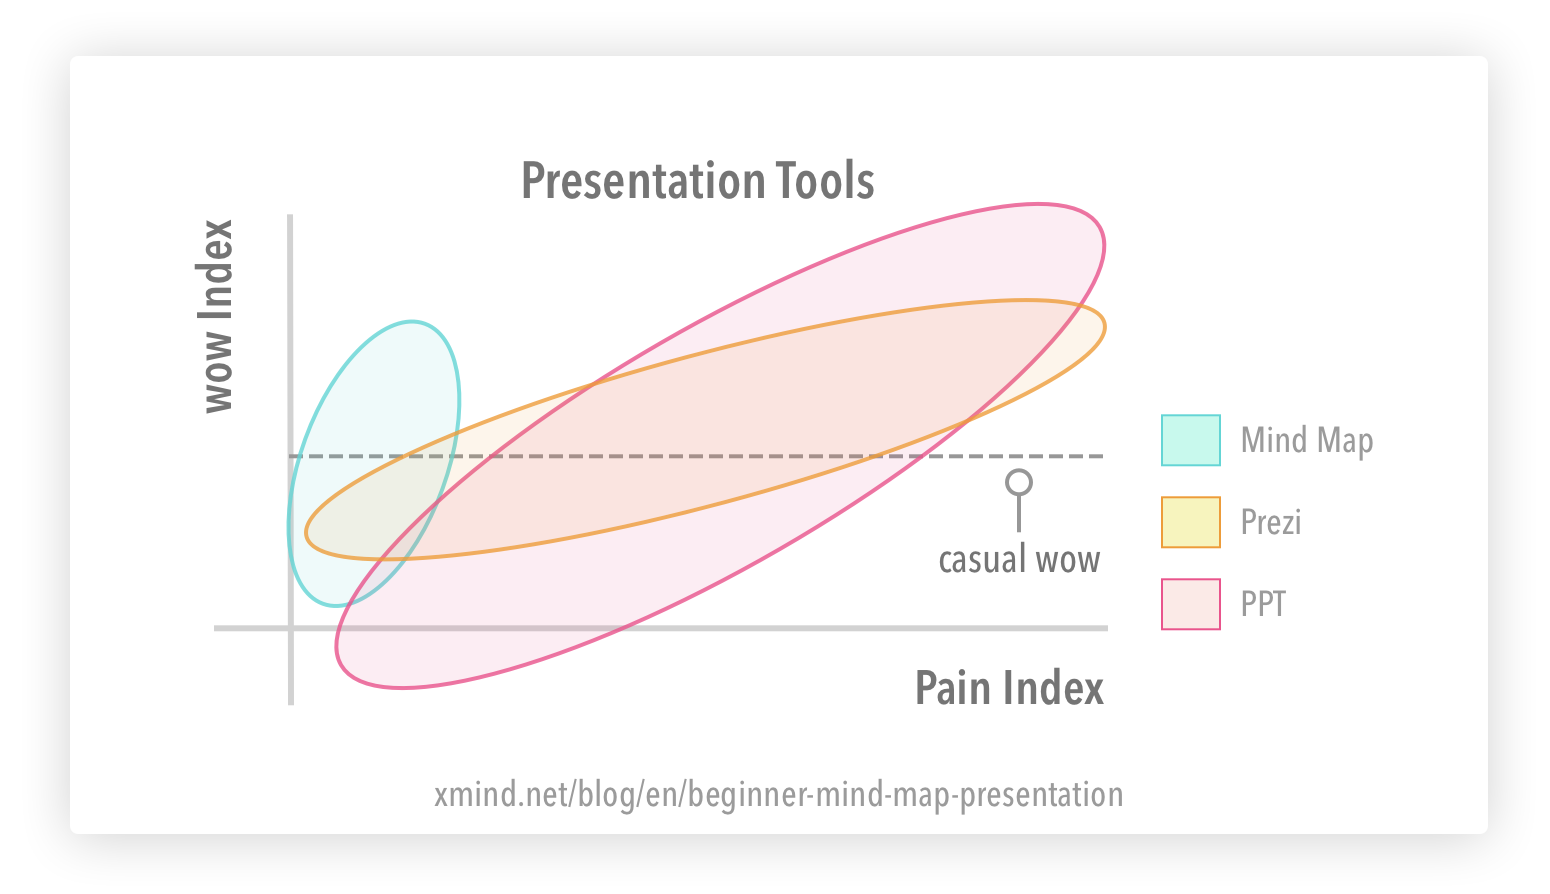
For casual scenarios like a weekly meeting or classroom discussions, mind maps are sufficient for presentation needs.
You may wonder why I claim mind maps require less pain to achieve "casual wow". There are a few reasons:
It is intuitive and quick to create and adjust
It's more than easy to create a mind map. Just Tab or Enter to add topics. Since changing layout is just a matter of drag-and-drop, you need not worry anything about editing when you should only focus on drafting.
Imagine you are using a linear type of presentation tool, the effort you need to change content across a section can be pretty frustrating. Also, since the structure is auto-generated, you need not waste time on aligning and distributing elements on the page.
Plus it is more streamlined between ideation and presentation. Since mind maps are helpful for brainstorming. And a mind map can show as your speech slides. So you need not consider how to transfer your ideas from outlines to a PPT.
It guarantees a baseline for visual design and animation
Most mind map tools provide built-in templates. Even if they don't. The form of mind maps gives a basic visual design for your thoughts.
Who knows how much time we put into making our slides beautiful! In XMind, we provide built-in themes and editor-picked mind map templates. You are free from the troubles of the visual designs of your diagrams.
In terms of animations, zooming-in-and-out is the most basic way of animations. In XMind 8, we provide walk-through and slide animations. I will unravel them in "how-to" section.
It helps audience distill the complex informations
In a 2017 mind map survey, among nearly 1000 responses, "distilling complex info" is rated as the #1 benefit by respondents.
Mind maps are non-linear. It has a better info-space ratio than linear graphics. Your audience can get a big-picture view within a small canvas. And they also notice the connections between nodes.
When it isn't helpful
Mind map presentations work well for providing information but lack the emotional or story-telling power. Also, the appearance of mind maps creates a bit of informality.
So mind map presentations work best for non-corporate, informative speeches. For example, workshop training and classroom teaching.
It also requires more buy-in if your teammates never heard of "mind map".
How to create a mind map presentation
The three main components of presentations are content, design, and delivery. During mind mapping, your mind map is both the content and design of the presentation slides.
There are many workflows of mind map presentations. We introduce a different workflow here, which talks more about slide development.
Step 1: Write down your goal of this presentation
Know your audience is always the first and most crucial step. It dictates everything to follow.
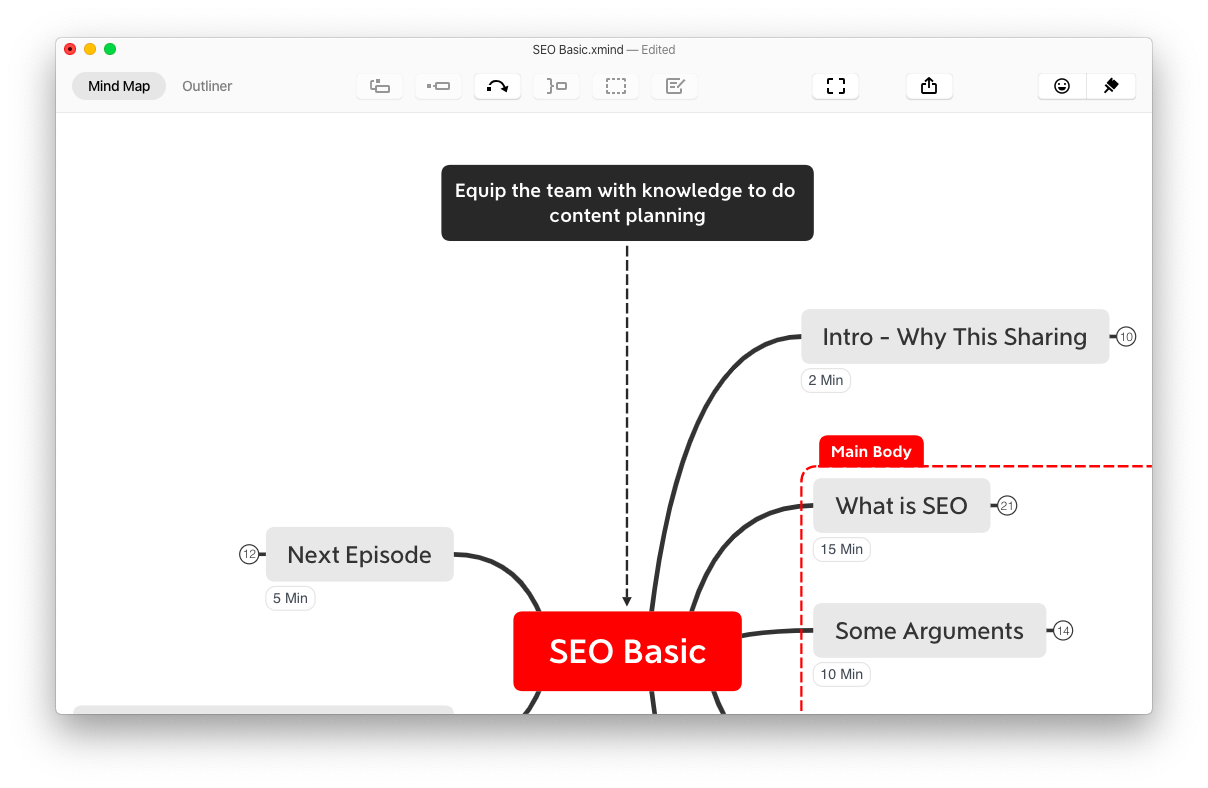
In the mind map, you can put your goal and presentation content in the same place. Put a box on top of the canvas, and write down your goal of this presentation. With the goal visualized, you always get the hint to stick to the goal.
In some cases, you can even write it in the format of the introduction. And start your presentation to your audience with the purpose of this speech.
Step 2: Map out the content
Put the title in the Central Topic. Use ENTER to create boxes of the same level. And TAB to add subtopics.
And now you have your first draft of content.
Best Practices
Use a delivery-driven approach. First, put down your ideas as quickly as possible. Then demo-present to yourself or friends before fine-tuning. This is a very outcome-oriented approach and prevents you from over-researching or over-optimizing in the early stage.
Keep points concise. Use New Sheet From Topic and Notes if needed.
Step 3: Create slides
In XMind, you have three ways of creating slides.
1. Implicit Slides (Available in every mind map software). No actual slides created, just zoom-in and zoom-out. Close all the subtopics before the presentation, then extend the branch one by one.

2. Slide-Based Mode (Only available in XMind 8). Frame select the area you want to include in each slide and create slides inside XMind.
3. Walk-Through Mode (Only available in XMind 8). Go through every topic and focus on one item each time. Move on to the next box by arrow keys.

Step 4: Do a demo presentation
Now write down your time allocation for different slides. You can put down Labels on the various branches to remind you of the time allocation.
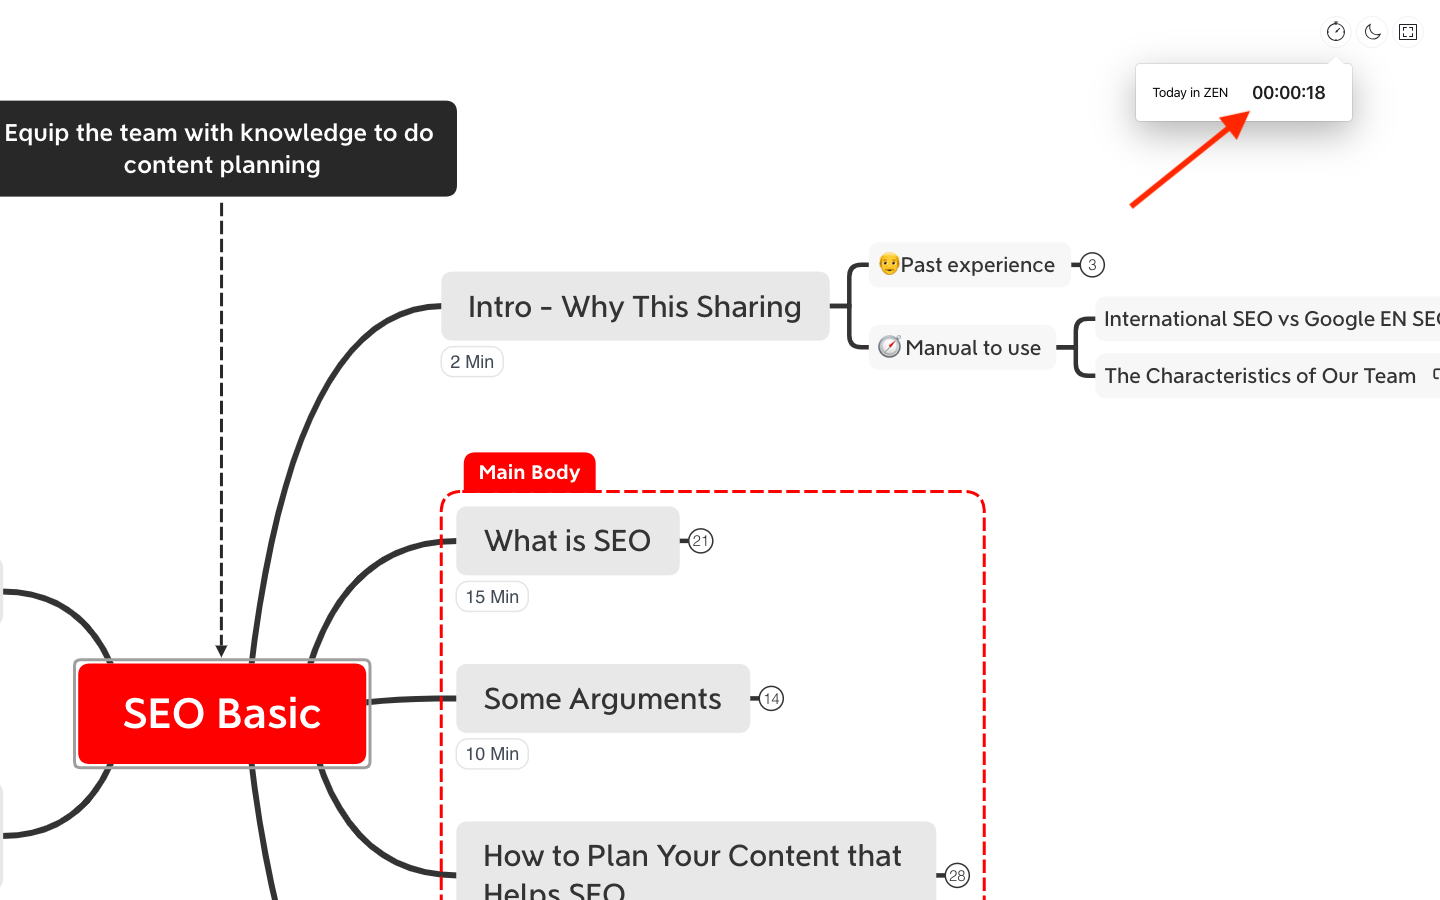
And start to present with timer. For a demo or even final presentation, you can use Zen Mode - a full-screen mode with a timer.
Adjust your time allocation and take notes on what you need to simplify or add.
Best Practices
Show the big picture at the start and end of the presentation. It helps the audience to follow your ideas better.
Step 5: Fine-tune your content and design
Now it's time to fine-tune the details.
First, based on the notes taken in step 4, organize the structure and select the best-fitted structure.
To grab the audience's attention, you can use Quick Style or Callouts to highlight important topics.
Quick Style

Callout

Best Practices
Use visuals to lighten up your slides. It can be as simple as adding emojis or stickers. XMind also supports GIF.
Try to have the best-fitted structure. One thing to start is to think about the relationship you want to emphasize. For example, if you're going to show a strong Top-Bottom/Trivial-Important connection, you can choose Org-Chart. Like the "Three Levels" branch in the following.
More tools for quick presentations
A mind map is just one way to help the audience enjoy your speech. What other tools do you use that are important to your speech or training? Are there any others you’ve seen but maybe not sure how to implement on your own?
Share with us on Twitter at @sikayc and @xmind!
Try Xmind Free